Salesforce.com Customization Handbook – Book Review

December 10, 2014

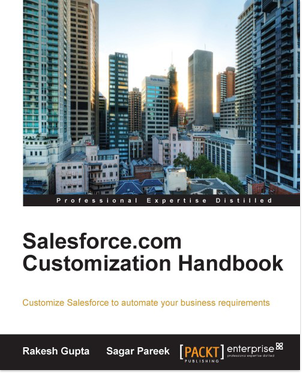
Salesforce.com Customization Handbook – by Rakesh Gupta and Sagar Pareek.  Packt Publishing.

Given the number of books that have now been written on Salesforce CRM I had initially wondered whether there was a need for another salesforce.com handbook and what this book was seeking to provide. However having now read it I think it targets perfectly those looking to begin their journey into the world of salesforce.com configuration and is very well written.

5986EN_Salesforce.com Customization Handbook_Cover

I would say that it would be equally useful for a salesforce.com power user or a non-salesforce.com developer looking to get started for the first-time in salesforce.com configuration and provides a valuable reference for finding specific setup features.

I found the opening chapter a little full of salesforce.com marketing material but it does offer an overview of the current salesforce.com products (Sales Cloud, Service Cloud etc, along with screen prints of the current list prices for these licenses). I think this was adequate for those completely new to salesforce.com but for readers with some familiarity they may want to skip. Alternatively it might have been useful to comprehensively cover the full set of offerings say for new users and existing users and mention Unlimited edition as an example.

There is a section on creating a developer account which I think is very good would possibly suggest that this chapter is particularly aimed at readers who are new to customising salesforce.com and as such I believe this to be a very useful section for readers about to start their journey into the customising of salesforce.com.

I was wondering whether there would be any detailed information about Salesforce license types as this is often cause for confusion in my experience and I was pleased to see that this is comprehensively covered in the 2nd chapter on user management.

Chapter 2 continued with material that in my opinion was suited to both beginner and more experienced readers with salesforce.com customisation knowledge. I particularly liked the section on how to raise a case for Salesforce support to Enable multiple currencies; a very useful set of instructions.

With continued reading I found there to be very good description and explanation of roles and profiles and a detailed example of creating a custom profile.  One thing I would have like to have known is the reason you might want to have a custom profile instead of a standard profile and any other considerations in the same depth that they explain sharing rules but this is just me being picky for what is a very good book.

Overall I fould this book to be an extremely useful guide to salesforce.com customisation. Admittedly there were a couple of areas that seems a little vague and lacked some detail such as Organisation Wide Defaults however as the reader gains more experience (using the targeted references in this book) they could probably gain better understanding by doing and by accessing other resources. Essentially with the help of this book, though, readers will have a very useful detailed and targeted reference to the customisation and setup navigation which is often all that is needed.

There is a very thorough set of information on E-mail Administration and the section on the email deliverability options was very useful as was the chapter containing workflow which also offers a fine description of the limitations of the workflow and how to monitor time-based workflows which many other books often omit.

Finally, If you are looking for a book that explains every admin or setup that is available in salesforce then this is not the book for you however if you want a more distilled handbook that aims to provide a detailed focus for getting started on customisation or are relatively new to the CRM platform whereby you’d like specific pointers to help customise the system then I would highly recommend this book.


Developing Applications with Salesforce Chatter : Book Review

February 2, 2014

Early in 2013 I was invited by Packt Publishing to write a book about developing apps with Salesforce Chatter. Unfortunately due to other writing engagements I was unable to accept the offer but thought it was a very good idea for a book.

ImageThe book has since been written by the authors Rakesh Gupta & Sagar Pareek and I have been invited by Packt Publishing to write a review which I have been keen to accept and discover what has been written.

In reviewing their book Developing Applications with Salesforce Chatter the chapters that I found most useful are Chapters 2, 3 and 4.

I found the configuration and set up of Chatter which is covered in Chapter 2 (Configuring and Setting Up Chatter) which offers step-by-step instructions to be very well researched and were explained well. Here I found the detailed use of screen shots particularly helpful.

The code samples for Chatter are provided in Chapter 3 (An Introduction to Development with Chatter) and Chapter 4 (Building the Chatter Application and Cleaning) are quite comprehensive and are described in a very straightforward manner and will be very useful for developers and admins to enhance their company’s use of Chatter.

Chapter 5 takes a look at the Chatter REST API. It is suitable as an overview for the topic and I feel the chapter would have benefitted from more detail and sample code.

Chapter 1 (Introducing Salesforce Chatter) is less clear than the other chapters and seems to go a little off topic. It first provides an overview of cloud computing and salesforce.com and then covers the general topic of collaboration (albeit with some clumsy use of language).

Chapter 1 then covers the benefits of Chatter along with a look at the Chatter data model. The above sections seem fine however the sections: Maximizing your customer satisfaction and Improving your ROI are difficult to read and not particularly useful.

In summary I enjoyed reading this book and found the practical elements, such as the configuration and code samples for Chatter very useful and I found them to be very well described. The more theoretical and conceptual sections (as found in Chapter 1) were far less useful and were not described particularly well.

To find out more visit the Packt Publishing website: Developing Applications with Salesforce Chatter


Creating a News-ticker on the salesforce.com Home Page

March 8, 2013

Animated text messages and custom HTML styling can be very effective in gaining users’ attention.

Not only do they allow a reasonably large amount of characters to be presented on a single line of text but they also provide a visually dynamic “headline news” style of message delivery for what can otherwise be overlooked static text.

You can draw attention to your news message on the Salesforce Home Page using this custom home page component recipe and by following these steps:

How to do it…

Carry out the following steps to create a News-ticker message on the Home Page:

  1. Navigate to the home page components setup page, by clicking the following: Your Name | Setup | Customize | Home | Home Page Components.

  2. Click New

The New button is found by scrolling down the page to the Custom Components section.

  1. Click Next (on the Understanding Custom Components Splash screen if shown)

  2. The Next button is found on the Understanding Custom Components Splash screen (this page is only shown if the checkbox Don’t show this page again has not previously been checked) as in the following image:

Understanding Custom Components

Understanding Custom Components

Here, we are presented with the Step 1. New Custom Components page.

  1. Enter the name of the Custom Component in the Name field.  In this recipe,  type the text News Ticker.

  2. Select the HTML Area option from the Type options list.

  3. Click Next.

  4. Ensure the option Wide (Right) Column is selected within the Component Position option list.

Note: You are unable to change this setting after the component is created.

  1. Check the Show HTML check box

The above step is important! Locate and check the Show HTML checkbox as shown in the following image:

Check the Show HTML Checkbox

Check the Show HTML Checkbox

  1. Paste the following code (as shown in the image further below):

<center>

<div style=”border: 1px solid rgb(51, 153, 255); width: 96%; color: black; font-size: 18px; background-color: rgb(255, 255, 204);” id=”NewsTicker”>

<marquee onmouseover=”this.scrollAmount=0″ onmouseout=”this.scrollAmount=6″ width=”98%”>Welcome to the Salesforce CRM Admin cookbook</marquee></div></center><br>

  1. Click Save

We have created our News Ticker custom home page component but we are not finished yet. We now need to add the custom home page component to a home page layout

  1. Navigate to the home page components setup page, by clicking the following: Your Name | Setup | Customize | Home | Home Page Layouts.

  2. Determine which home page layout to place the component and click Edit. Here we are editing the home page layout named DE Default as shown:

Home Page Layouts

Home Page Layouts

We are presented with the Step 1. Select the components to show page.

  1. Check the News Ticker check box in the Select Wide Components to Show section as shown:

News Ticker

News Ticker

  1. Click Next

  2. Position the News Ticker as the top position in the Wide (Right) Column using the Arrange the component on your home page. section as shown:

Step 2 Order the Components

Step 2 Order the Components

  1. Click Save

How it works…

By using HTML and in particular the HTML Marquee tag and CSS (Cascading Style Sheets), we are able to present a moving text section.  You can see what this looks like in the following image:

How it Works

How it Works

There’s more…

Replace the text Welcome to the Salesforce CRM Admin cookbook text with a suitable message of your choice.

When entering HTML and Javascript code into the HTML editor section (in Step 2 of the New Custom Component wizard) you must ensure that the code is valid.

Please pay particular attention to the displayed warning message Please ensure that the HTML code entered below is valid, well formed HTML. Poorly written HTML in this component may cause the entire Home tab to appear incorrectly.

There is a maximum of 20 Custom Components that can be added to a Home Page layout.

The marquee tag is a non-standard HTML element which causes text to scroll up, down, left or right automatically. “The marquee element was first invented for Microsoft‘s Internet Explorer and is still supported by it. Firefox, Opera, Chrome and Safari web browsers support it for compatibility with legacy pages.”  from http://en.wikipedia.org/wiki/Marquee_element

Reference: Salesforce CRM Admin Cookbook

Salesforce CRM Admin Cookbook

Salesforce CRM Admin Cookbook

  Packt Publishing – http://www.packtpub.com/salesforce-crm-admin-cookbook/book

Book and eBook expected May 2013. Pre-order now!


salesforce.com Cheat Sheets

December 28, 2012

salesforce.com provide various cheat sheets, covering Apex code, Visualforce, Chatter, the Force.com SOAP API, formulas and GitHub, that are concise reference guides to each of these technologies.

Salesforce Cheat Sheets

Salesforce Cheat Sheets

The number of cheat sheets provided seems to be increasing all the time and are so useful as they summarize the most important aspects of each technology in a compact, searchable and printable form.

They now provide the following cheat sheets:

  • Collaboration: Chatter Cheat Sheets
  • App Logic: Apex Code Cheat Sheet
  • User Interface: Visualforce Cheat Sheet
  • Integration: SOAP API Cheat Sheet
  • Integration: REST API Cheat Sheet
  • Security Cheat Sheet
  • App Logic: Formulas Cheat Sheet
  • Tooling: GitHub Cheat Sheet

The online cheat sheets are always up to date, and new ones added to include the most important reference material.  You can either print the cheat sheets, or view them online.

Enjoy!


Populating a historic Year Range on the Salesforce CRM calendar pop-up

October 16, 2012

Salesforce.com provides many useful field types from formulas and roll-up summaries to the simple URL field.  One field that can be a little frustrating for users is the date field due to the way it only allows a limited selection of year values to be chosen from the picklist.

Restricted Calendar

Restricted Calendar

When clicking on a date field the user is automatically presented with a pop-up calendar and when selecting the Year picklist they can only ever select from a range of seven years.  The seven year range is based on the current year.

The minimum year selectable is the year prior to the current year and the maximum value of year that can be selected is the current year plus six years.  Obviously, this is not much usef when trying to enter historic dates, such as birth dates.

Here we are going to improve the user experience and enable historic years to be selected from the picklist with the following steps:

1. Navigate to the home page components setup page, by clicking the following: Your Name | Setup | Customize | Home | Home Page Components.
2. Click New
The New button is found by scrolling down the page to the Custom Components section.
3. Click Next (if shown)
The Next button is found on the Understanding Custom Components page (if this is shown)
4. Enter the name of the Custom Component in the Name field.  In this recipe,  type the text Calendar Year Historic.
5. Select the HTML Area option from the Type options list.
6. Click Next.
7. Ensure the option Narrow (Left) Column is selected within the Component Position option list.
8. Check the Show HTML check box
Important: The above step is important – Locate the Show HTML checkbox as shown in the following image

show HTML

show HTML

9. Paste the following code :

<br>
<script type="text/javascript">
function insert(pobjSelect, psText, psValue){
 var lobjOption = document.createElement("Option"); lobjOption.text = psText;  lobjOption.value = psValue;  pobjSelect.options.add(lobjOption);
}
var winLoaded = window.onload;
window.onload = function(){   if(winLoaded){
  winLoaded();
 }
 var e = document.getElementById("calYearPicker");
 if(e != null){
  for(i = e.length - 1; i>=0; i--){
   e.remove(i);
  }
  var d = new Date();    var startYear = d.getFullYear() + 6;
  for(var i = 1920; i<startYear; i++){    insert(e, i, i);   }  }
}
</script>

10. Click Save
We now need to add the custom home page component to a home page layout

Extended Calendar

Extended Calendar

11. Navigate to the home page components setup page, by clicking the following: Your Name | Setup | Customize | Home | Home Page Layouts.
12. Determine which home page layout to place the component and click Edit.
13. Check the Calendar Year Historic check box in the Select Narrow Components to Show section
14. Click Next
15. Position the Calendar Year Historic as the lowest position in the Narrow (Left) Column using the Arrange the component on your home page.
16. Click Save


Graphical account credit score using Javascript, CSS and Visualforce

September 23, 2012

Introduction

Here we describe a solution for rendering a credit score graphically using Javascript and CSS within a Visualforce page and adding the page as an inline section on a Salesforce Account Page Layout. 

Credit Score 78

Credit Score 78

First we have created a custom field on the Account object called Credit Score (Credit_Score__c) which will feed the values rendered in the graphical range.  The Credit_Scrore_c field is of type Number.

Now we can create the credit score graphic using the following steps:

  1. Navigate to the Visualforce Pages setup screen, by clicking: Your Name | Setup | Develop | Pages.

  2. Click New

  3. Enter Credit Score in the Label field

  4. Accept the default Credit Score in the Name field

  5. Paste the following code:

<apex:page standardController="Account">
 <style>
  td.green{background-color:#00FF00; border:none}
  td.red{background-color:#FF0000; border:none}
  td.grey{background-color:#DDDDDD; border:none}
  td.green_label{background-color:#00FF00; color:white; 
       border:1px solid white;}
  td.red_label{background-color:#FF0000; color:white; 
       border:1px solid white;}        
 </style>
 <script>
  var iLimit = 0;
  var iThreshold = 40;
  if( {!Account.Credit_Score__c} )
   iLimit = {!Account.Credit_Score__c};
  document.write('<table style="border: 1px solid white; 
        border-collapse:collapse;">');
  document.write('<tr>');
  for(var i=0; i<100; i=i+5){
   if( iLimit <= iThreshold ){
    if( i<iLimit )
     document.write('<td class="red" 
             nowrap="nowrap">&nbsp;</td>');
    else
     document.write('<td class="grey" 
             nowrap="nowrap">&nbsp;</td>');
   }else{
    if( i<iLimit )
     document.write('<td class="green" 
             nowrap="nowrap">&nbsp;</td>');
    else
     document.write('<td class="grey" 
             nowrap="nowrap">&nbsp;</td>');
   }
  }                     
  iLimit <= iThreshold ? 
     document.write('<td class="red_label" 
               nowrap="nowrap">&nbsp;&nbsp;' + 
               iLimit + '&nbsp;&nbsp;</td></tr></table>') :
     document.write('<td class="green_label"
               nowrap="nowrap">&nbsp;&nbsp;' + 
               iLimit + '&nbsp;&nbsp;</td></tr></table>');
</script>
</apex:page>

Now add the Visualforce page as an in-line section on the standard Account page by accessing the appropriate page layout and dragging the Credit Score from the available Visualforce pages on the left section.

Here is what the graphics looks with a credit score value set to 34:

Credit Score 34

Credit Score 34


Custom field data types in Salesforce CRM

November 12, 2011

When creating a custom field in Salesforce, the first step is to select the appropriate data type for the field. There are many different field types which allow the storage of records of various data values such as numbers, dates, percentages, and so on. The following picture shows some of the fields and the rest of the blog describes the field types that are available.

Salesforce CRM Field Types

Auto Number
An Auto Number field produces a unique number that is automatically incremented for each saved record. As such this is a read-only field where the maximum length is 30 characters of which 20 are reserved for further prefix or suffix text that you can specify.

Checkbox
A Checkbox allow your users to set or unset a value to mark the attribute as either true or false.

Currency
Salesforce provides a Currency field to specifically capture a money value. Here the Salesforce CRM application applies currency-related codes which are applied when working with that field record.

Date
The Date field provides a way for your users to either pick a date from a pop-up calendar or to manually key the date. Your users can also enter the current date clicking on the date link positioned to the right of the field.

Date/Time
The Date/Time field provides a way for your users to either pick a date from a pop-up calendar or to manually key the date and the time of day. Your users can also enter the current date and time by clicking on the date and time link positioned to the right of the field. Here, the time of day includes A.M. or P.M. notation.

Email
Email fields provide the facility to store an individual’s email address. The Salesforce CRM application provides a very robust method of verifying the correct format of e-mail addresses before they are allowed to be saved.

Formula
Formula fields provide a method to automatically calculate a value which is calculated from other fields or values stored within Salesforce CRM.

Hierarchical relationship
This field type forms a hierarchical lookup relationship between relevant objects. For the user hierarchical relationship, users can use a lookup field to associate one user with another For example, you can create a custom hierarchical relationship field to store each user’s direct manager.

Lookup relationship
The lookup relationship field creates a relationship between two records so you can associate them with each other. For example, opportunities have a lookup relationship with cases that enable you to associate a specific case with an opportunity.  A lookup relationship has no effect on record deletion or security, plus the lookup field is not required in the object page layout.

Master-detail relationship
Creates a parent-child type relationship between records where the master record controls certain behaviors of the detail record such as security and record deletion.  Master-detail relationship fields can only be created on custom objects that relate to a standard object and not the other way. If the Master record is deleted then all detail records are also deleted. You can create up to two Master-detail relationship fields per custom object.

Number
The Number data type can be used to enter any number with or without a decimal place (the number of decimal places can be specified) and saved as a real number with any leading zeros removed.

Percent
With Percent fields in Salesforce CRM, a percentage sign is automatically appended to the entered number. Fields values lose precision after 15 decimal places. If the decimal value is greater than 15 and a percent sign is added to the number, a runtime error occurs.

Phone
The Phone field allows the users in your organization to enter any telephone number.

Picklist
The Picklist field allows users to choose a value from a set of pre-defined text values. The maximum length of the text values is 255 characters.

Picklist (Multi-select)
The Picklist (Multi-select) field allows users to choose more than one picklist value from a set of pre-defined text values. When saving and viewing, the data is stored as text along with semi-colons which are used to separate the individual picklist values.

Roll-Up Summary
A Roll-up Summary field (or RUS) is used to automatically display the summarized values of the related records. This can be a record count of related records or a calculation of the sum, minimum, or maximum value of the related records.

Text
The Text field allows users to enter any combination of alphanumeric characters. The maximum length of the text value is 255 characters.

Text (Encrypted)
The Text (Encrypted) field allows users to enter any combination of alphanumeric characters. The text is then stored in an encrypted form (this data type is available by request to Salesforce support). The maximum length of the text value is 255 characters. Encrypted fields are encrypted with 128-bit master keys and use the AES (Advanced Encryption Standard) algorithm.

Text Area
The Text Area field allows users to enter alphanumeric characters on separate lines. The maximum length of the text value is 255 characters and a warning is displayed when the number is about to be reached (as shown in the screenshot above).

Text Area (Long)
The Text Area (Long) provides for the storage of up to 32,000 characters that display on separate lines similar to a Text Area field. However you can specify a lower maximum length of this field type from between 256 and 32,000 characters. This data type is not available for activities or products on opportunities. Only the first 254 characters in a rich-text area or a long-text area is displayed in a report.

Text Area (Rich)
Using the Text Area (Rich) data type your users are provided with text field with an embedded toolbar.  This toolbar allows for the simple formatting the text and provides for the adding of images and URL web links.

URL
The URL field allows users to enter a web link. When the web link is clicked the Salesforce CRM application opens a new browser window to show the web page.

Reference: Salesforce CRM: The Definitive Admin Handbook book and eBook

Salesforce CRM: The Definitive Admin HandbookPackt Publishing

http://www.packtpub.com/salesforce-crm-definitive-admin-setup-configuration-customization-handbook/book

Amazon

http://www.amazon.com/Salesforce-CRM-Definitive-Admin-Handbook/dp/1849683069/ref=sr_1_1?ie=UTF8&qid=1321101181


Delegating User Management in salesforce.com

March 19, 2011

Delegating User Management in salesforce.com

If you are a system administrator of a Salesforce org you are likely to be highly skilled at multitasking as often you are expected to carry out several tasks at once.
 
One such task that you can spend a significant amount of time and effort on is the setting up and managing of  users in the system and this is especially so with an org that has a large number of users or a complex role hierarchy.

The good news is you can delegate aspects of user administration to users who are not assigned with the system administrator profile to allow you to focus on tasks other than managing users for every department or structure that your company has within Salesforce.

Not only will his save you time and effort but this provides further benefits for global organizations with time zone and cultural differences as it allows a user based in that region with local knowledge to create the users which also saves time and provides a better user experience.
For example, you may want to allow the manager of the Asia Pacific Operations team to create and edit users in the Asia Pacific Operations Team Leader role and all subordinate roles.

There are currently two ways of setting this kind of delegated user management access:

  • Create a profile with the Manage Users permission
  • Use delegated administration

Create a profile with the Manage Users permission
This option is not recommended and should be very carefully considered as it allows a much greater range of system administration functions to be carried out by the user. 
In addition to creating and managing users the Manage Users permission also allows the user: to expire all passwords; to clone, edit or delete profiles,  to edit or delete sharing settings; to edit user login hours and a great deal more. 
Not only are these non-user administration tasks allowed for users with the Manage Users permission but it is also not possible to restrict the types of profiles that can be selected when creating new users so there are several security risks with this option.  For example the Manage User permission would allow someone to create users with the system administration permission.

Use delegated administration
Delegated administration is a more secure method for providing delegated user management access as it allows you to assign limited administrative privileges to the selected non-administrator users in your organization.
Delegated administrators can perform the following tasks: creating and editing users and resetting passwords for users in specified roles and all subordinate roles; assigning users to specified profiles; logging in as a user who has granted login access to their administrator.
To create delegated groups, follow the path Your Name | Setup | (Administration Setup)  | Security Controls | Delegated Administration.  Now click on the  New button or select the name of an existing delegated administration group. 

Manage Delegated Groups

Manage Delegated Groups

Here we look at the existing group that has been named “User Management”.

Delegated Group - User Management Example

Delegated Group - User Management Example

The Delegated Administrators section allows you to select and add the users that are to be given the delegated administration permission.
The User Administration section allows you to select and add roles which the delegated administrators can assign to the users they create and edit.  They can assign users for the stated roles and all subordinated roles.
The Assignable Profiles section allows you to select and and add profiles which the delegated administrators can assign to the users they create and edit.
For security profiles with the “Modify All Data” permission cannot be included to be assigned by delegated administrators.  See the following error when attempting to include the System Administrator profile.

Assignable Profiles - System Administrator Error

Assignable Profiles - System Administrator Error

Select Enable Group for Login Access if you want to allow delegated administrators in this group to log in as users who have granted login access to their administrators and are in the roles selected for the delegated administrator group.

And there you have it. 

Using the delegated administration feature takes a little effort to understand and to be comfortable with its setup but it is so much more secure and will prevent any unexpected side effects which might happen with the simple granting of the Manage Users permission. 

With so many things in life prevention is often better than cure this feature should leave everyone feeling happy!


CRM History – salesforce.com CRM

December 5, 2010

Yesterday I posted a tweet linking to an interactive timeline from softwareadvice.com showing the history of CRM software.

http://twitter.com/SetupForce/status/11040861248823296

CRM Software History

I think the timeline is a nice piece of work but it got me thinking how the graphics and description for salesforce.com CRM, milestoned in 1999, needed a little more detail (and a lot more appreciation for how it has evolved).

Back then there were anouncements like the one reported by InformationWeek on Monday, December 6, 1999 as

“… Salesforce.com Inc. today will introduce a CRM service that strips sales-force automation down to a Web site that provides front-office functions…”

“The 6-month-old startup, … will aim the service at companies with 10 to 200 salespeople. It will offer features found in traditional sales-force automation tools, including account management, contact management, opportunity management, forecasting, and reports. But unlike traditional packages, the service requires no implementation or maintenance by the customer.”

http://web.archive.org/web/20000302220511/www.informationweek.com/story/IWK19991206S0002

And the graphics back then looked more like:

Salesforce 1999

I wonder how many of the 27,000 salesforce community, attending Dreamforce 2010 this week, equate their use of salesforce.com with this target user base and feature list!


Final weekend to maintain your salesforce.com certification – spooky!

October 31, 2010

The salesforce.com Winter ’11 certifications are to be made available next week.

Details for the Winter ’11 Release Training can be found here

http://www.salesforce.com/customer-resources/learning-center/details/release-training.jsp

Final Weekend for passing salesforce.com Spring '10 certification

All certified professionals must pass the release maintenance exams three times per year and if you have missed two consecutive maintenance exams your credentials will expire. Noooooooooooo!

With the availability of the Winter ’11 certifications on Monday November 1st 2010 this is the final frightful weekend to pass the Spring ’10 certification otherwise you may be at risk of losing your credential.

 You must also have passed the Summer ’10 certification to remain fully current in the programme.

salesforce.com Certification Expiration Warning